Table of contents
- Understanding Amazon RDS
- Key Features and Benefits
- Getting Started with Amazon RDS
- Best Practices and Considerations
- Introduction
- Task-01
- Step 1: Create a Free Tier RDS Instance of MySQL
- Step 2: Create an EC2 Instance
- Step 3: Create an IAM Role with RDS Access
- Step 4: Assign the Role to EC2
- Step 5: Connect EC2 to RDS
Welcome back, fellow cloud enthusiasts! On Day 44 of our journey through Amazon Web Services (AWS), we're diving headfirst into the world of Relational Database Service (RDS). Amazon RDS is a fully managed relational database service that simplifies database setup, operation, and scaling in the cloud. Let's explore how RDS revolutionizes database management and empowers businesses to focus on innovation rather than infrastructure.
Understanding Amazon RDS

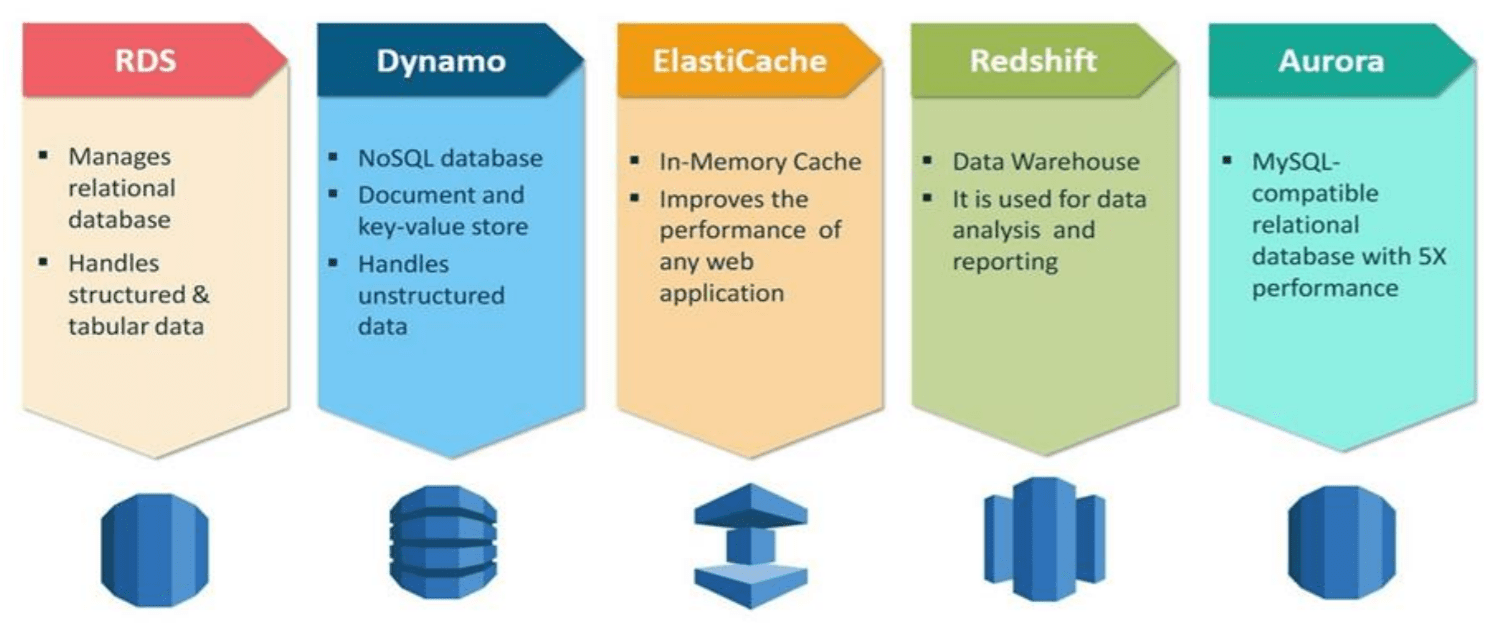
Relational databases play a crucial role in modern applications, powering everything from e-commerce platforms to financial systems. However, managing traditional relational database systems can be complex, time-consuming, and resource-intensive. Enter Amazon RDS, a game-changer in the realm of database management.
Amazon RDS offers support for several popular database engines, including MySQL, PostgreSQL, Oracle, SQL Server, and MariaDB. With RDS, AWS handles the heavy lifting of database administration tasks such as provisioning, patching, backups, and scaling, allowing users to focus on building and optimizing their applications.
Key Features and Benefits
Managed Service: Amazon RDS is a fully managed service, eliminating the need for manual database administration tasks. AWS handles routine maintenance, backups, and updates, freeing up valuable time and resources for other projects.
Scalability: RDS makes it easy to scale database instances up or down based on demand. With a few clicks or API calls, users can adjust compute and storage capacity to accommodate fluctuations in workload.
High Availability and Durability: RDS offers built-in features for high availability and durability, including automated backups, Multi-AZ deployments, and Read Replicas. These features help ensure business continuity and data protection.
Security and Compliance: Amazon RDS provides robust security features, including encryption at rest and in transit, network isolation with Amazon VPC, and IAM integration for access control. These measures help users meet compliance requirements and protect sensitive data.
Monitoring and Metrics: RDS offers comprehensive monitoring and metrics through Amazon Cloud Watch, allowing users to track database performance, set alarms, and troubleshoot issues proactively.
Getting Started with Amazon RDS
Getting started with Amazon RDS is straightforward. Users can launch a new database instance with a few clicks in the AWS Management Console or programmatically using AWS SDKs or CLI. During setup, users can configure database engine, instance type, storage type, and other parameters based on their requirements.
Once the database instance is provisioned, users can connect to it using standard database client tools or through application code. From there, they can begin loading data, running queries, and managing database settings as needed.

Best Practices and Considerations
While Amazon RDS simplifies many aspects of database management, it's essential to follow best practices to optimize performance, cost, and security:
Choose the right database engine and instance type based on workload characteristics.
Implement regular backups and enable Multi-AZ deployments for high availability.
Monitor database performance and adjust resources as needed to maintain optimal performance.
Encrypt sensitive data at rest and in transit to protect against unauthorized access.
Regularly review and update security groups, IAM policies, and other access controls to minimize risk.
Introduction
Amazon Relational Database Service (Amazon RDS) is a fully managed relational database service provided by Amazon Web Services (AWS). It allows you to set up, operate, and scale a relational database in the cloud with ease. In this blog post, we will walk through the process of creating a Free tier RDS instance of MySQL, setting up an EC2 instance, creating an IAM role with RDS access, and connecting the EC2 instance to the RDS instance.
Task-01
Step 1: Create a Free Tier RDS Instance of MySQL
Log in to your AWS Management Console.
Navigate to the Amazon RDS service.
Click on "Create database."
Choose the "MySQL" engine and select the "Free tier" template.
Configure the settings, including DB instance identifier, master username, and password.
Set the remaining configurations such as DB instance size, storage, and networking options.
Review your configurations and click "Create database."
Wait for the RDS instance to be created. Once it's available, note down the endpoint for future reference.
Step 2: Create an EC2 Instance
Navigate to the Amazon EC2 service in the AWS Management Console.
Click on "Instances" in the left-hand navigation pane.
Click "Launch Instance."
Choose an Amazon Machine Image (AMI), such as Amazon Linux 2 or Ubuntu.
Select an instance type, and configure instance details, storage, and security groups.
Review your configurations and click "Launch."
Create or select an existing key pair to securely connect to your EC2 instance.
Launch the instance and wait f
or it to become running.
Step 3: Create an IAM Role with RDS Access
Navigate to the IAM service in the AWS Management Console.
Click on "Roles" in the left-hand navigation pane.
Click "Create role."
Choose "Amazon EC2" as the service that will use this role.
Attach the "AmazonRDSFullAccess" policy to the role to grant RDS access.
Review the configuration and click "Create role."
Step 4: Assign the Role to EC2
Go back to the EC2 service in the AWS Management Console.
Select the EC2 instance you created earlier.
Click on "Actions" > "Security" > "Modify IAM Role."
Choose the IAM role you created in Step 3 and save the changes.
Step 5: Connect EC2 to RDS
SSH into your EC2 instance using the key pair you created.
Install the MySQL client on the EC2 instance:
sudo apt-get install mysql-client
- Use the following command to connect to your RDS instance from the EC2 instance, replacing
<RDS_ENDPOINT>,<DB_USERNAME>, and<DB_PASSWORD>with your actual values:
mysql -h <RDS_ENDPOINT> -u <DB_USERNAME> -p<DB_PASSWORD>
You will be prompted to enter the password.
Once connected, you can start working with your MySQL database on RDS from your EC2 instance.
That's it! You've just completed the task. 🎉
Thank you so much for taking the time to read till the end! Hope you found this blog informative and helpful.
Feel free to explore more of my content, and don't hesitate to reach out if need any assistance from me or in case of you have any questions.
Happy Learning!
